
You need to cover a tattoo for a job interview, wedding, or family gathering, but you’re not sure where to start. The wrong product won’t last through the day, and thick layers can crack or sweat off at the worst moment. There’s a method that professionals use to make ink disappear completely. You’ll need more than your everyday concealer to pull it off.
Key Takeaways
- Assess your tattoo’s size, ink colors, location, and skin type before choosing products and techniques.
- Gather heavy-duty concealer, color correctors, setting powder, spray, primer, and dense brushes for full coverage.
- Cleanse skin with oil-free cleanser, dry thoroughly, and apply lightweight primer without moisturizers underneath.
- Neutralize dark ink with orange or peach corrector, red ink with green, then layer thin concealer coats outward.
- Set with translucent powder pressed firmly, bake briefly, mist with setting spray, and pack touch-up supplies for mobility.
Assess Your Tattoo: Size, Colors, and Location
Why start with guesswork when a quick evaluation sets you up for success? Grab a mirror and study your tattoo’s dimensions. You’ll measure precisely—small spots demand less product than full sleeves demand.
Now examine the ink colors saturating your skin. Black lines cover differently than vibrant reds, deep blues, or yellows. You’ll notice lighter pigments peek through makeup more stubbornly than darker ones.
Check where the tattoo sits on your body. You’ll find joints and curved areas shift product throughout your day. Flat surfaces like shoulders stay simpler. Oily zones require different prep than dry patches.
You’re mapping your specific challenges before buying anything. This assessment determines your technique, layering strategy, and setting method. You’ll save frustration by knowing exactly what you’re working with from the start.
Gather the Right Cover-Up Products for Your Needs
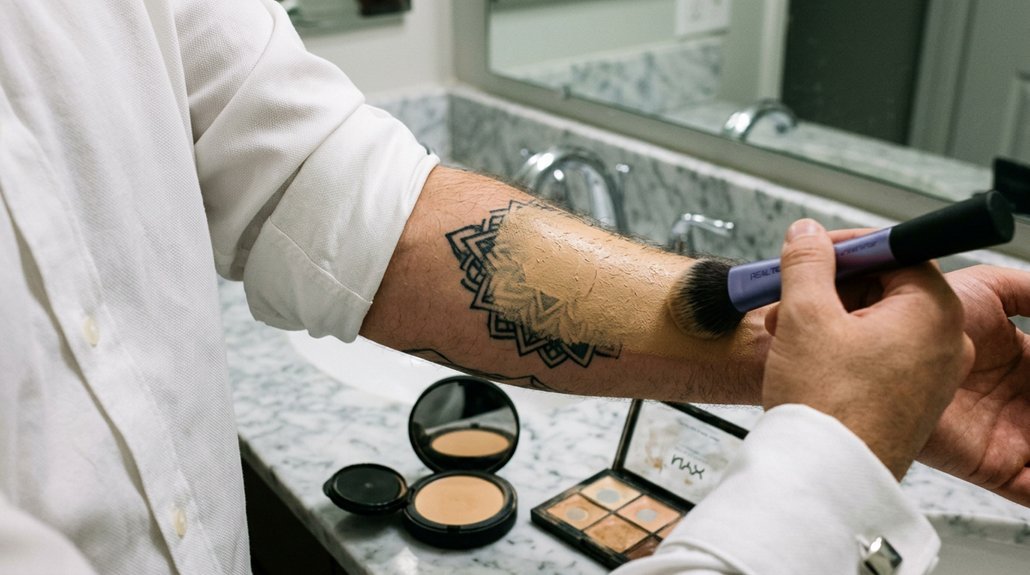
What exactly belongs in your kit depends on the blueprint you’ve already mapped. You’ll need a heavy-duty concealer or tattoo-specific cover product—standard foundations won’t cut through dense ink. Grab a color corrector too; orange or peach tones neutralize dark blues and blacks, while green cancels red. Match your skin tone precisely, and don’t skimp on quality.
You’ll also want a setting powder and makeup fixative spray to lock everything in place. Brushes matter: use dense, flat brushes for application and a sponge for seamless blending. Don’t forget primer—it creates a smooth canvas and extends wear time. If your tattoo sits on a body part that bends or rubs, consider a waterproof, transfer-resistant formula. Test products beforehand; you’ll avoid disasters when it counts.
Prep Skin for Maximum Makeup Adhesion
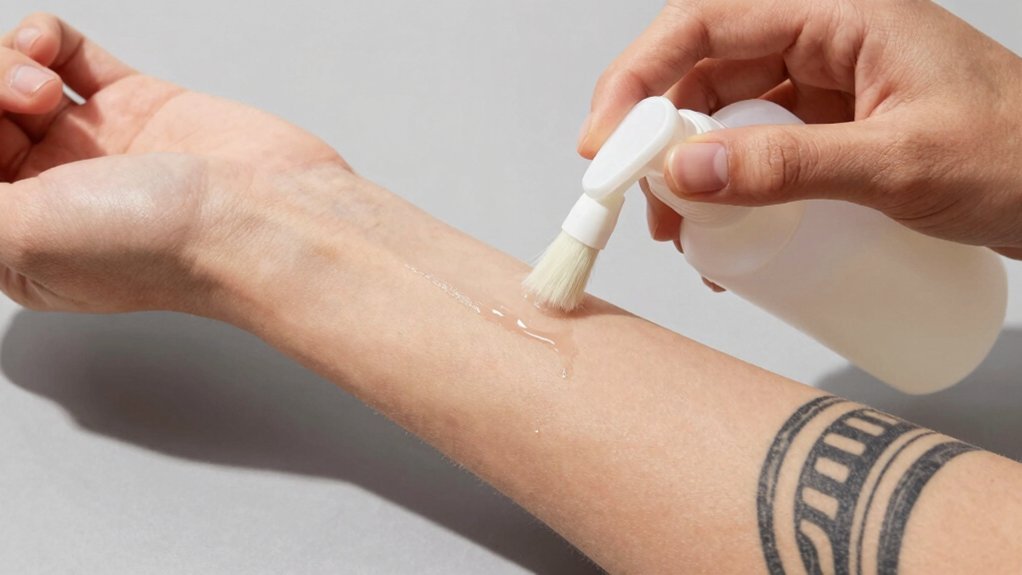
Where should you start before brushing on any pigment? Cleanse the tattooed area thoroughly with a gentle, oil-free cleanser. Remove all dirt, oil, and residue that could repel your makeup. Pat the skin completely dry with a clean towel—moisture creates slip, and you need grip.
Next, you’ll apply a lightweight, water-based primer. Skip heavy silicones; they pill under layers. Smooth it across the tattoo in thin, even strokes and let it set for sixty seconds. This creates a tacky base that locks pigment to skin.
If the area’s hairy, you’ll shave carefully beforehand. Stubble catches product and creates texture. Finally, avoid moisturizers right before application—they soften the hold. You’re building a foundation that lasts, not pampering skin. Dry, primed, ready: that’s your canvas.
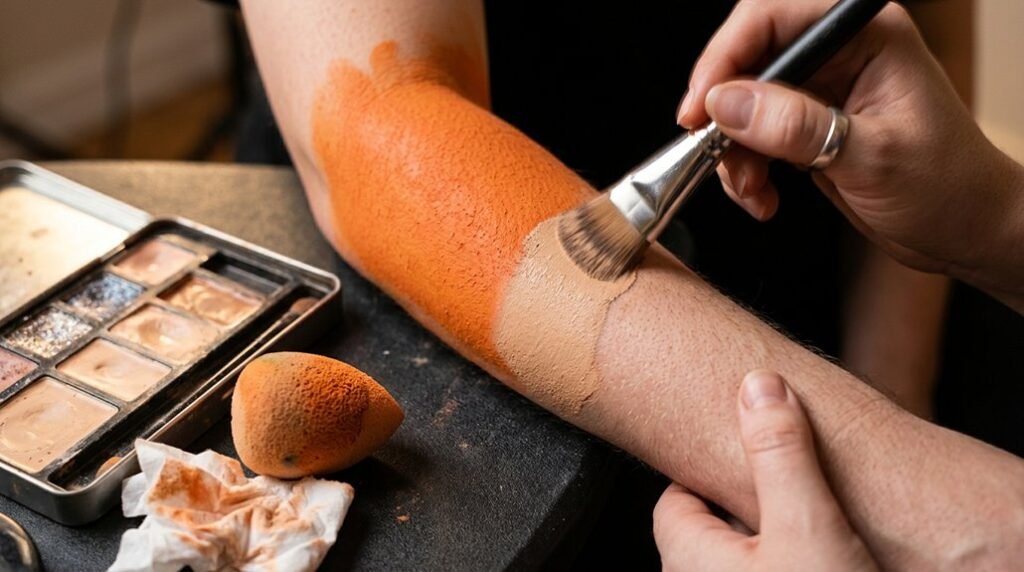
Counter Dark or Colorful Ink With Color Correction
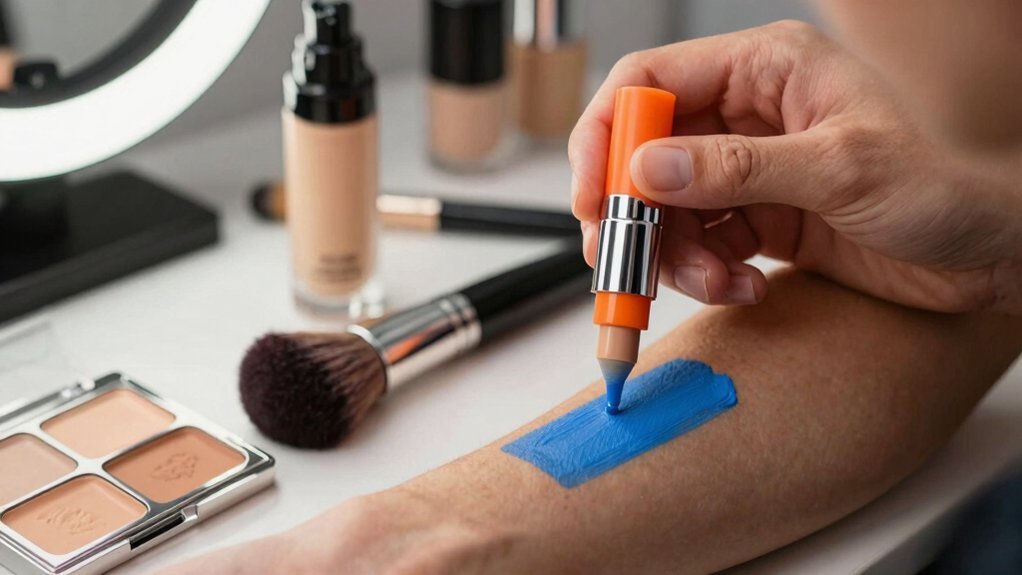
How do you neutralize a black dragon or a crimson rose before layering on concealer? You reach for color-correcting theory. Remember the color wheel: opposites cancel each other out.
Dark black ink—whether it’s tribal bands or bold lettering—pulls orange. You’ll dab orange or peach corrector directly onto the darkest areas, working it into the skin with a small brush. The warmth immediately lifts those inky depths toward neutral territory.
Vibrant colors demand their own opponents. You pat green corrector over crimson roses, cherry blossoms, or any stubborn red ink. Blue tattoos surrender to peach or salmon tones.
Don’t over-apply. You’re aiming for balance, not a rainbow. Press the corrector thin and even, allowing it to dry slightly. This creates your neutral canvas—nothing more, nothing less.
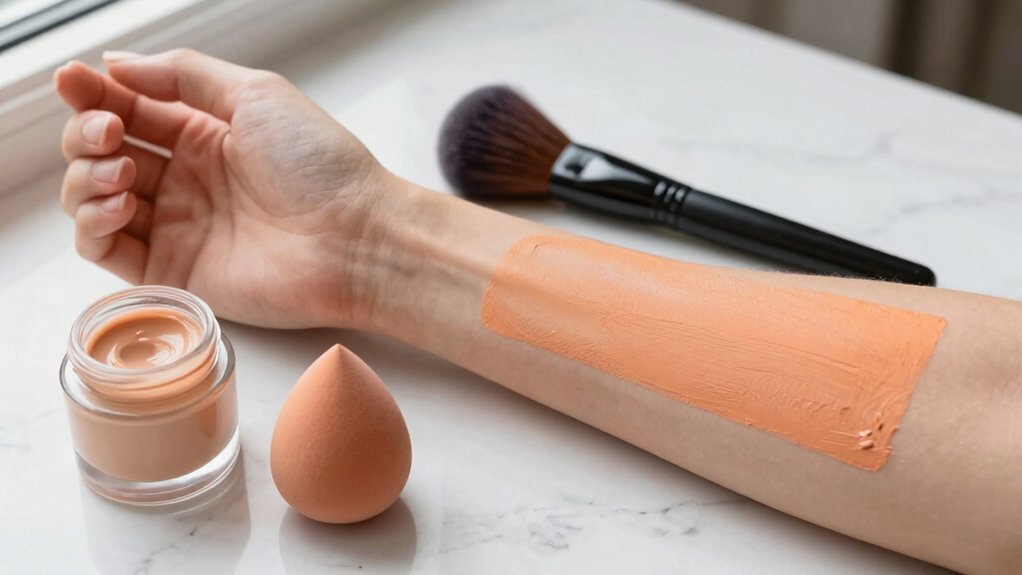
Layer Concealer for Complete Tattoo Coverage
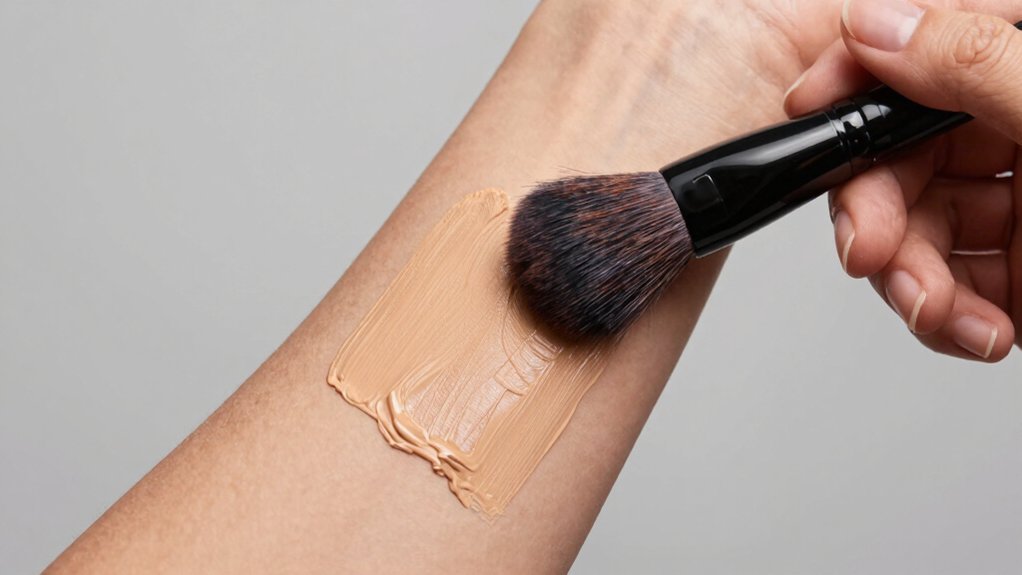
Why stop at color correction when you haven’t sealed the deal? Grab a full-coverage concealer that matches your skin tone exactly. Dot it directly over the corrected area using a small, flat brush. Pat—don’t rub—to build opacity without disturbing the color-correcting layer beneath. You’ll need two to three thin layers rather than one thick blob, which cracks and creases.
Blend the edges outward until they melt seamlessly into your natural skin. Let each layer set for thirty seconds before adding the next. If the tattoo peeks through, add another pinpoint layer only where needed. Check your work under natural light; shadows reveal missed spots you didn’t catch in bathroom lighting. The goal isn’t cakey perfection—it’s erased ink nobody questions.
Set Your Cover-Up for All-Day Wear
What’s the point of flawless coverage if it slides off by noon? You need to lock everything in place. Start with a translucent setting powder. Press it into the concealer with a velour puff—don’t sweep. Baking works wonders here. Let the powder sit for three to five minutes, then dust off the excess.
Follow with a setting spray. Hold it eight to ten inches from your skin and mist in an X pattern. This melts the powder into a skin-like finish and adds durability.
Pack blotting papers and a small powder compact for touch-ups. Dab—don’t rub—any oily spots that emerge. Your tattoo stays hidden through heat, humidity, and long hours. You’ve invested time in coverage; now you’re protecting that investment all day.
Adapt Your Technique for Hands, Neck, and Joints
When covering tattoos on hands, necks, or joints, standard techniques fail fast. These areas bend, twist, and rub constantly, so you’ll need to adapt your approach.
Start with a thin, flexible concealer layer—thick makeup cracks when skin moves. You’ll build coverage gradually rather than packing it on. On knuckles and finger joints, press product into creases with a damp sponge; don’t swipe across.
Set these areas with translucent powder immediately, then add a flexible setting spray. You won’t bake here—heat creates settling lines.
For the neck, blend downward into the collarbone so there’s no visible edge. Match to your chest tone, not your face.
On all mobile areas, you’ll carry blotting papers. Oil breaks down coverage fastest where skin moves most.
Handle Midday Touch-Ups Without Starting Over
How do you salvage fading coverage without stripping everything back to bare skin? You’ll spot-treat instead. Pack a small bag with your original concealer, a travel brush, and blotting papers.
First, you’ll blot away oil and sweat gently—don’t rub. You’ll identify where coverage has worn thin, usually at edges or high-friction spots. You’ll tap a thin layer of concealer only onto those areas, feathering outward with your brush to blend with existing makeup. You’ll set immediately with powder to lock everything together.
You’ll avoid adding heavy layers; buildup draws attention. If color has shifted slightly, you’ll adjust with a tiny dot of corrector before concealer.
You’ll check your work in natural light. In two minutes, you’ll restore seamless coverage and continue your day confidently.
Remove Cover-Up Safely and Restore Your Skin
The day won’t end until you’ve lifted every last layer off your skin without stripping it raw. You’ll reach for an oil-based makeup remover, not harsh rubbing alcohol. Massage it gently across the covered area, letting the oils break down the heavy pigment and setting spray. You’ll feel the product dissolve rather than drag.
You’ll rinse with lukewarm water, then cleanse with a mild, non-foaming face wash. You’re removing residue, not scrubbing tile grout. You’ll pat—never rub—your skin dry with a soft towel.
You’ll follow immediately with a fragrance-free moisturizer. Your skin’s barrier has worked overtime under those layers. You’ll give it peptides or ceramides overnight. You’ll skip exfoliants for twenty-four hours. You’ve covered the tattoo; now you’ll uncover healthy skin underneath.
Conclusion
You’ve got all the tools you need to hide any tattoo—big, small, colorful, or dark. With the right prep, color correction, and layering, your ink disappears completely. Set it properly and you’re set for hours. Whether it’s your neck, hand, or a bendy elbow, just adapt your technique and touch up as needed. When the day’s done, remove gently and let your skin breathe.